


Setting the Rotate About Point Manually
The rotate about point is the specific point on your object which the view is rotated about. Setting the Rotate About Point manually is very handy when zoomed in on detailed object features that require view rotation.
- Load any object.
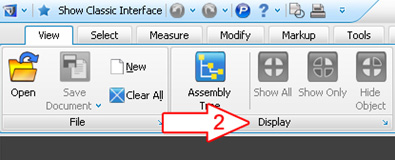
- Under the [View] tab left click on [Display] to open the Display menu.
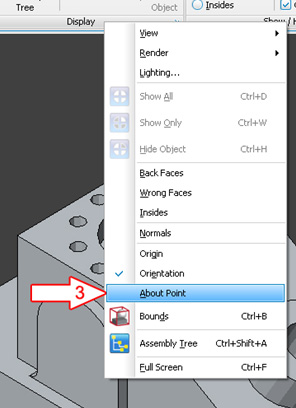
- Select [About Point] from the Display Menu to display the About Point.
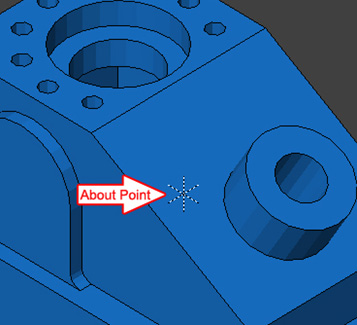
- Rotate the view and observe how the view is rotated around the object center (About Point is displayed as a black and white crosshair).
- Now place your mouse cursor over any area on the object and press Alt + Right Mouse at the same time to set your cursor location as the new About Point.
- Now simply rotate your view to see the new About Point in effect.
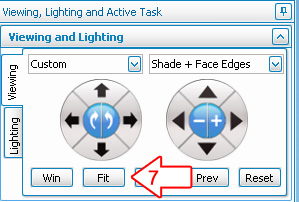
- To reset the About Point, simply press the [Fit] button located in the Viewing and Lighting panel to reset the about point to the selected object center.
Note: Steps 2 and 3 are for visual instruction only, displaying the About Point it is not a requirement.
If you have suggestions for future Tech Tips, please email us at support@solidview.com.
